2010年3月24日 星期三

Use of shader

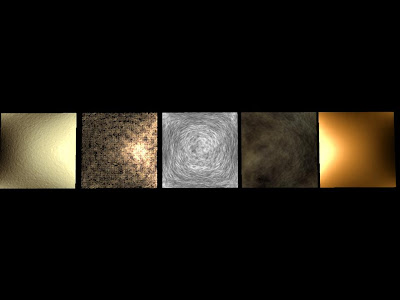
from left to right, they are:
bone, snake skin, raw steel, rock, gold.
All of them are download from creativecrash(http://www.creativecrash.com)
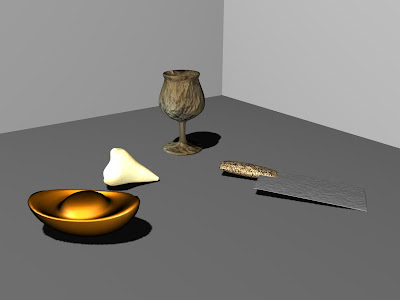
I made 5 object with 5 different shader,
( piece of gold with golden shader, a tooth with bone shader,
a cup with stone shader, and the holder of the chopper with snake skin shader,
the body of the chopper with steel shader.)
by changing the detail of interpolation in the colour part,
I can edit the detail to get different result.
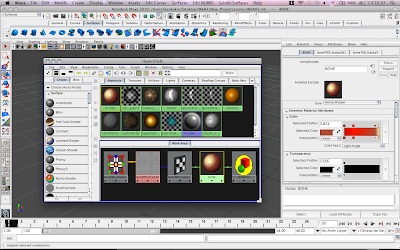
there are some selection in the interpolation, such as linear, smooth or spline.
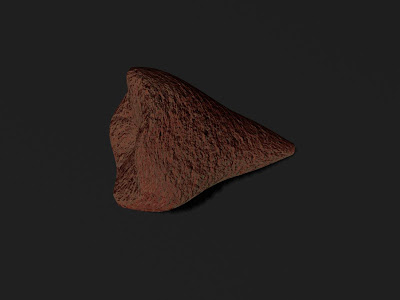
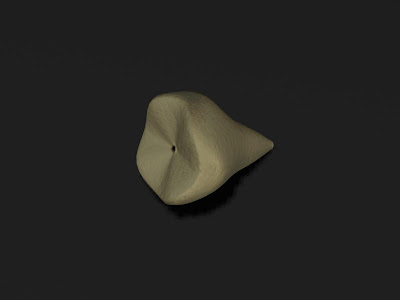
also, the bump mapping effect can be change,
the depth of the texture can be heavier.
(so this is a roten tooth.)

Appliction1:
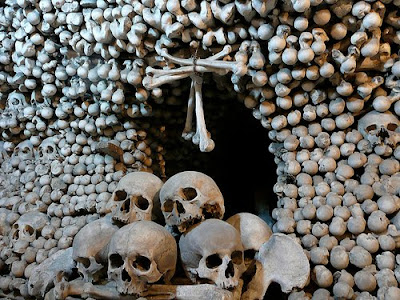
actually, I can use it to build the bone of animals or human,
or I can use it on objects of stone after changing its color.
(I think the result of the rotten tooth looks like stone.
So, maybe it is work after I decreased its eccentricity.
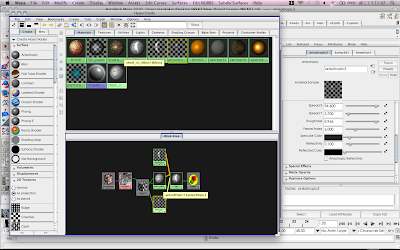

Chopper:

about the shader on the chopper, the steel part can be edit,
I can make the texture smoother.
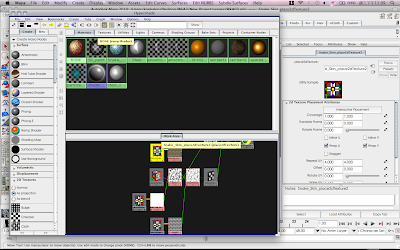

and the texture can comes with more details by
increasing the repeating number on the object
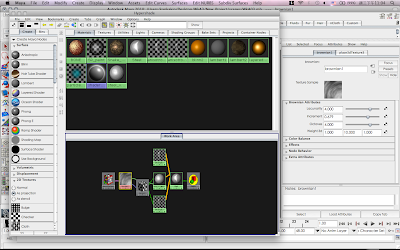

also the depth of bumping map can be change.
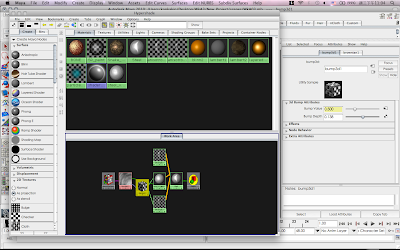
Before:
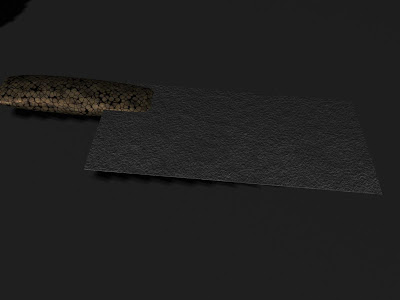

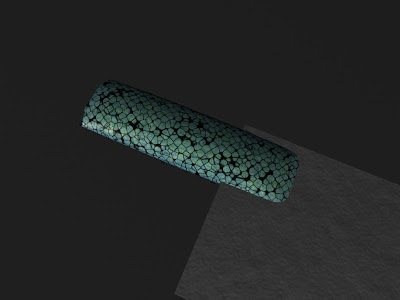
the colour of the snake skin can be change easily,
it has nothing special.

After:
Application2:
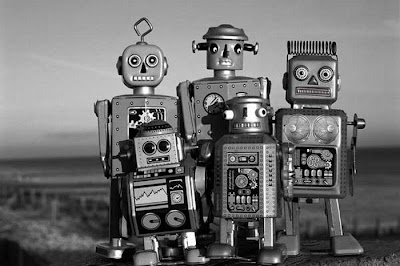
use the metal shader on vintage robot,
or other raw metal surface, the depth of bump mapping can be changed,
and the smoothness can also be changed,
so it is easy to assign this shader on the metal surface
in order to create different kind of steel texture
whatever raw or smooth.
2010年3月17日 星期三

How to make a auto-pencil in Maya

when I decided to take a photo for it, i just can't find it......


The outer part of the pencil:

1) Create a CV curve as the sketch shows. then revolve it in order to get the body of the pencil.

2) Create a cube and transform it like the picture. Then I can use "extrude" and scale tool to build the clip on the pencil.


The core of the pencil:

1) Create a new CV curve (1 linear) like the sketch and revolve it to earn the core of the pencil.

2) And the cap of the pencil can be made in the same way like the core of the pencil.

Finally, create a little polygon cylinder as an eraser. Then compose them all.

How the make an ipod touch in Maya


beware its socketand the smooth shape of earphone.

1) Create a nurbs sphere and transform it into an ipod sphere by moving its control vertex points.

2) Create a square and project it on the "ipod" to create the area for the screen.

3a) Create a sphere (will be deleted after this step), place it on the "ipod" and use booleans (differences) in order to create the button of ipod.

3b) the socket can be made in the same way


The wire of the earphone will use CV curve to finish:

1) Make the ipod "live", so the wire around ipod can be made by drawing CV curve.

2) And the wire around ipod and the wire lies on desk can be combined by using "attach curve".

The earphone:

1a) Create polygon cylinder. Transform and add subdivision point (height 2).

1b) Select the top of the cylinder and use "extrude" to made a hole on it.

2) Create sphere (nurbs) and move its control vertex to get the shape likes the one in sketch.

3) Repeat the method in part 2 to create this shape. Create a polygon cylinder and place at the place which the picture shows. Use booleans (differences) to create the little hole.

So all parts of the ipod touch is finished. let's combine them after placing them in right place.

How to make a sketchbook in Maya


it looks like a spring.

After my observation,
the sketch book can be divided in 3 parts.
The body, the chain(1) and the belt(2).
The body of sketch book can be made by cube easily.

The chain:

1a) Can be provided by CV curve, but move its control vertexs is needed in an effort to make it looks like a spring.

1b) The holes on book can be done by using booleans (differences) after the CV curve's part is done and the place of the hole is confirmed.

The belt:

2a) Create different CV curve and use "loft" to create its shape.

2b) create a cube and CV curve. Select the face on the cube and the CV curve. use extrude, then the cube is to extrude following the path. This method can give the belt thickness.

How the make a coke can in Maya


some texts can be found on the top.


the shape of its bottom is so special.


The coke-can can be divided in 3 parts. The top, the body and the ring.

The body of the coke can:

1) Create a CV curve as the picture shows. Select it and use "revolve". then the very basic coke can comes out.

The top of the coke can:

2a) Use create text tool to create texts as curves. Then project these texts on the top of the coke can. After that, select these faces of the text and use extrude.

2b) Make object live and draw the lines as the picture shows by using CV curves. Create circle for each CV curve. Select them with the curves group by group, then extrude.

By this step, the top of the coke can is done.

The ring on the coke can:

3a) Create a nurb sphere and transform it into a shape as the sketch shows. then the ring without holes is made.

3b) Create cylinders and twist them as the picture show in order to create the holes on the ring.

Place all parts at right places, then the coke can is completed.

How the make a desk-lamp in Maya


some lines on its head


1) Create 3 CV curses and select them all. Use "loft" to create the nurb shape.

2) Create 2 circles (smaller on for the button, bigger one for the pattern ) and make it be projected on the nurb shape.

3) Use extrude tools to push the faces in to make the pattern. And pull the smaller circle face out the make the button.


1) Create a cylinder and transform it like that one in the picture.

2) Duplicate & place them in the shadowed area. And use booleans (difference) to create 14 holes.

3) Create one more CV curve(1 linear) as the sketch shows

4) Select 2 curve which is highlighted in the sketch. Then use "loft".

5) Delete history, transform that curve like the bottom one. Select that 3 curves and "loft".

6) The head of the lamp is now combined by these nurb faces.


The neck of the lamp:

1) Create a circle and CV curves. Select them all and extrude. As a result, there a simple lamp's neck.

2) Make the neck live. Draw a CV curve on it. And create a new little square. select them and extrude.

3) There's a tube with accessary around. So the neck of the lamp is completed.

The base of the lamp:

1) Create a polygon sphere.

2) Move the vertex point of the lower part. then I will get a half sphere as a result.

3) Use "extrude" to create the pattern on the base easily.

Lastly, combine them all in the right place, then the lamp is finished.

2010年3月10日 星期三

Using Sun and Sky in Mental Ray

http://tutorialscentral.com/index.php?option=com_content&task=view&id=57&Itemid=30&limit=1&limitstart=1


It is so amazing!
but following this tutorial,
we can make environment under outdoor natural light metal ray by several click.
And by some setting, changing the position of the sun,
we can make the environment at the night or dawn.

How to create a Wet Shader in Maya

http://www.creativecrash.com/tutorials/how-to-create-a-wet-shader-in-maya#tabs


Bumping map is a very fast way to make a fake 3D texture.
this site provided an informative tutorial of bumping map.
And the writer explained the way of using bumping map for the sake of making illusion,
which make the object looks wet and fills in special texture.
And it also expand the use of the details of the setting,
such as the depth of the texture, the highlight of the texture.
After this tutorial, readers can firmly catch the basic of bumping map.

making-hair-styles-with-maya-fur

http://www.creativecrash.com/tutorials/making-hair-styles-with-maya-fur-#tabs


I need to learn this if i don't want to build a model with hard stiff hair.
this tutorial talks about the fur function in maya.
first, we need to select the faces of the an object,
which point out the area we want the hair to grow in.
Then make those faces to be an UV set in order to
make the hairs grow on those faces under the same rule.
After the hairs is already grown.
We can do some setting to edit the hairs,
such as length, curve, colour...... .
So we can make some simple hair style we want.
By this way, the surface of the teddy bear's hairy skin can easily be done.

And this is my try.

追蹤者

關於我自己